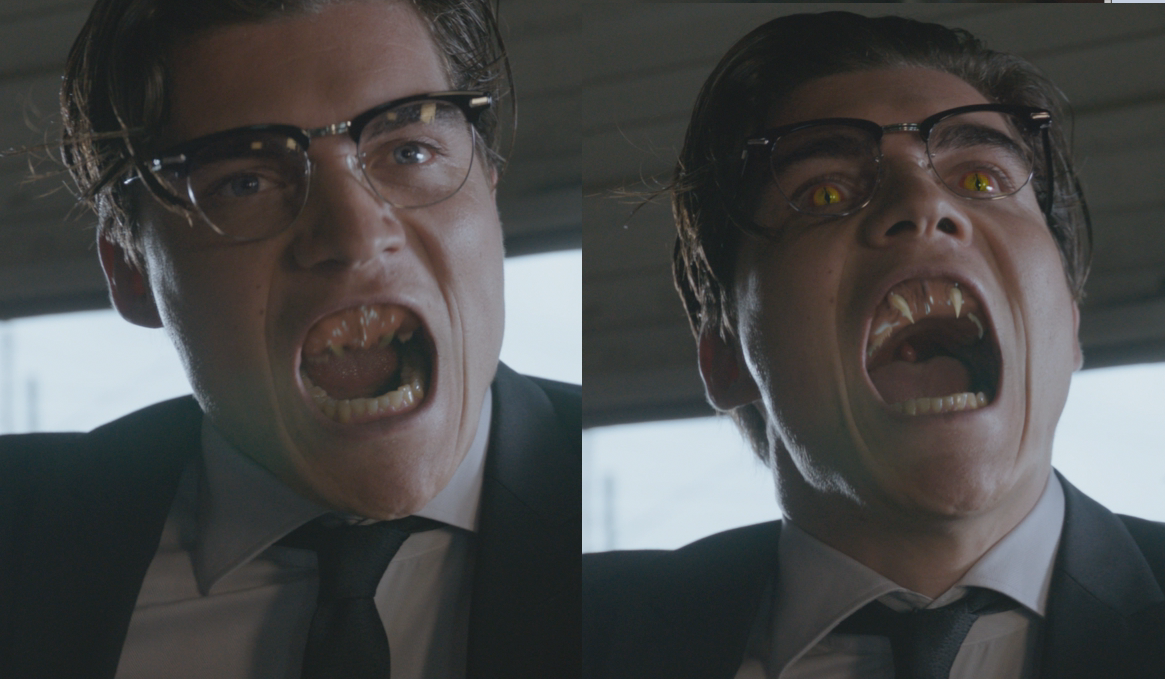
Muse VFX recently created visual effects for Robert Rodriguez’ From Dusk Till Dawn television series. The show involves a species of reptilian vampires whose teeth fold back like a snake’s.
Given the fast pace of television effects, we found that a traditional CG pipeline was painfully slow. The flexing gums meant that animation, lighting and rendering had to be handled in our 3D department, and each iteration required two or three days to get through the pipeline. In an effort to speed things up and make the process more flexible, I and my coworker Christian Bloch (author of the HDRi Handbook; go buy it!) tackled the problem of how to use a soft-skinned mesh in Blackmagic Fusion.
The excellent Krokodove plug-in suite has a Bender 3d tool that can, as you might expect, bend 3d geometry, but it does so indiscriminately. When we tried to use it, we found that we had to allow the entire front part of the gums to bend. What we wanted was to bend only the part of the mesh that held the teeth. The tool worked for wide shots, but it was unsuitable for close-ups.
The solution to this problem was to create our own bending tool that we could restrict to bending only the vertices we chose. Blochi used Modo to paint weight maps for the teeth and gums, and he passed them along as vertex colors. He was already using the red channel of the vertex color for some baked-in ambient occlusion, so he used green and blue to make separate weight maps for the left and right fang, allowing us to control them individually.
In a Custom Vertex 3D tool, I used the formulae for rotating a point on a coordinate plane to rotate the mesh. Multiplying the rotation by the vertex color performs the soft skin deformation. Blochi further refined the approach by adding a control for the distance between the fangs.
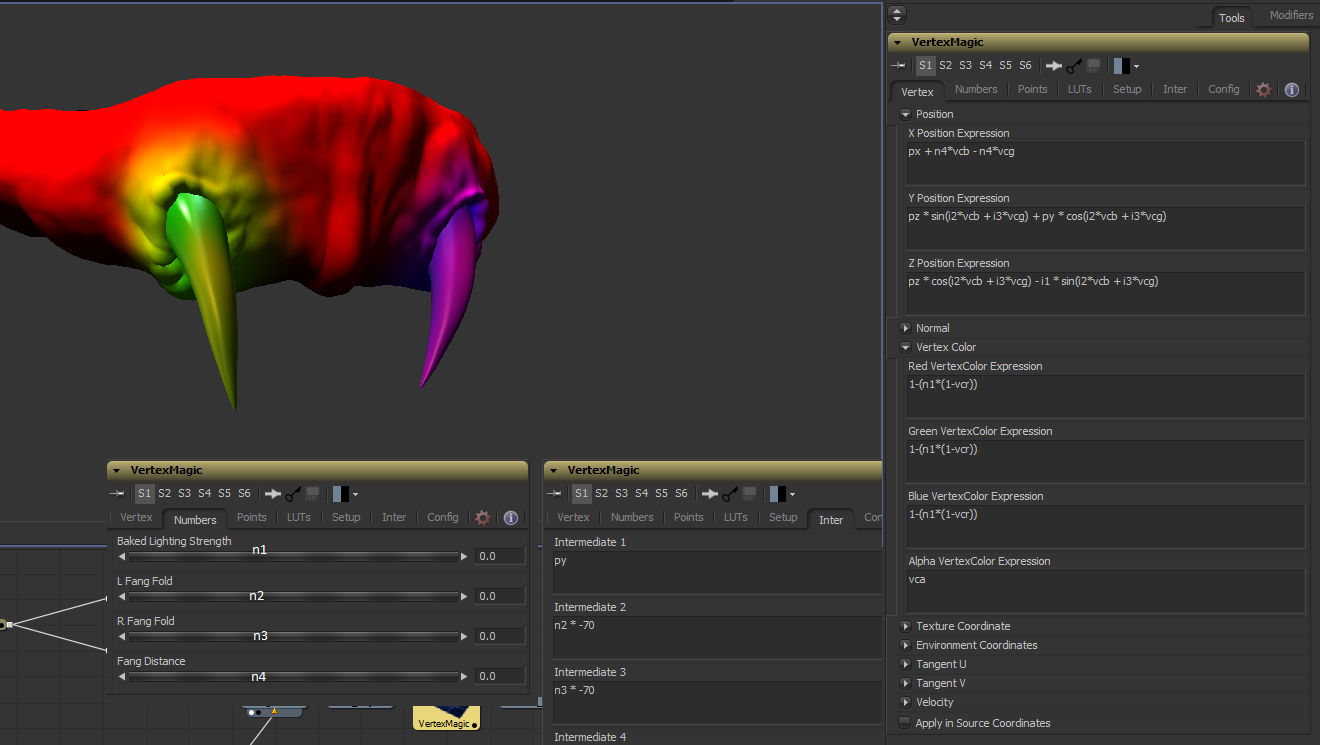
Here’s what’s going on in those expressions: In the X Position, we multiply the blue channel of the vertex color (vcb) by the Fang Distance slider (n4) and add it to the X position of the vertex (px). Then we subtract vertex-green (vcg) * n4 from px. So the fangs move in opposite directions according to the value in the Fang Distance slider.
The Y and Z positions use the rotation equations:
y’ = y * cos(theta) – z * sin(theta)
z’ = y * sin(theta) + z * cos(theta)
Normally you see that with x and y instead of y and z, but in this case we’re rotating in the y-z plane. We replace (theta) with (i2*vcb + i3*vcg). What that means is that the angle of rotation is determined by the color of the vertex multiplied by the Fang Fold slider. i2 and i3 are Intermediate expressions that multiply the slider by -70 in order to normalize the range of the slider from approximately 0 – 1.
The Z Position Expression has replaced what should be py with i1. The reason for this is that the Custom Vertex tool evaluates its expressions from the top down, and it finishes evaluating each one before moving on to the next. So by the time it reaches the Z Position, Y Position has already been changed. Since the Intermediate Expressions evaluate before the Vertices do, we place py into i1 so we don’t lose its original value.
We also take advantage of that quirk of the Custom Vertex tool to recolor the vertices to wipe out the weird colors and apply the Baked Lighting by replacing all three vertex color channels with the red channel, multiplied by the Baked Lighting Strength slider.
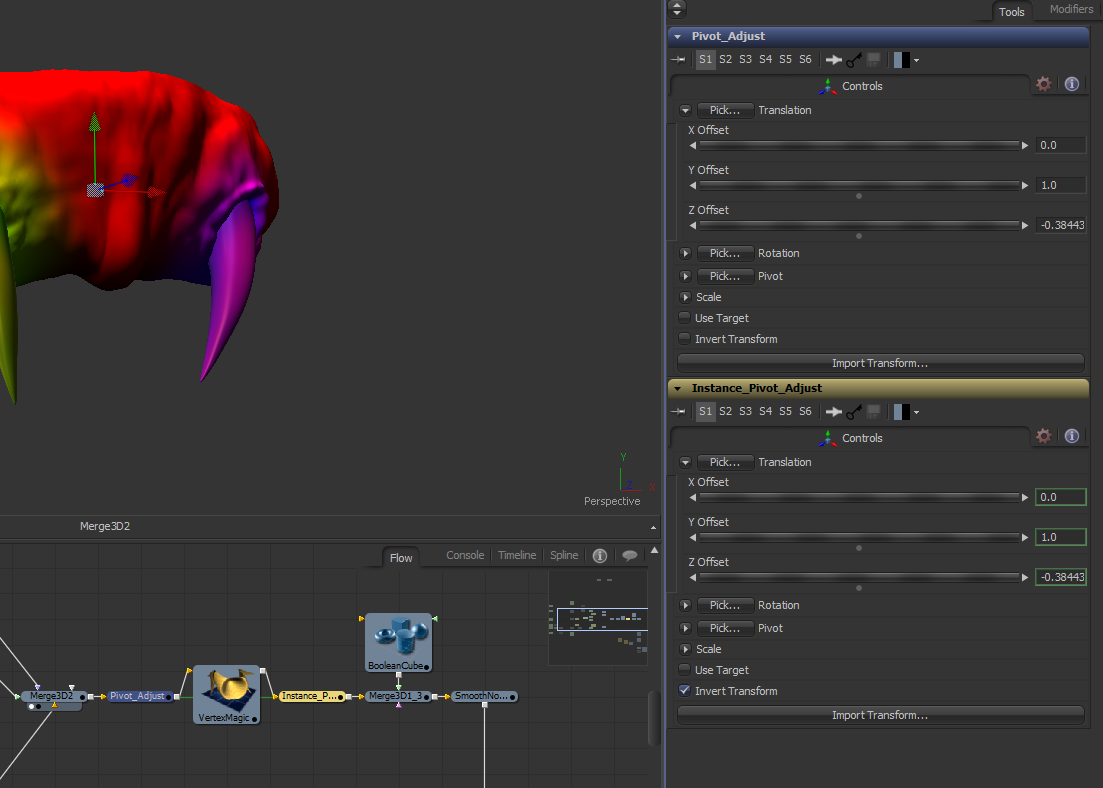
There is a challenge in this set-up: the rotation occurs around the origin. If you need a different center of rotation, you need to move the mesh so that your desired center is at the origin, and then move it back when you’re done. Here we have a Transform 3D node to move our fangs to the origin and an instance of the node with Invert Transform deinstanced and ticked to undo the translation.
Using this technique allows us to animate, light and render the teeth entirely inside Fusion. A small change to the timing of the teeth animation no longer requires a lengthy trip back to the 3D department, allowing us to turn over many more iterations and freeing our 3D artists and our render farm for more complex shots.
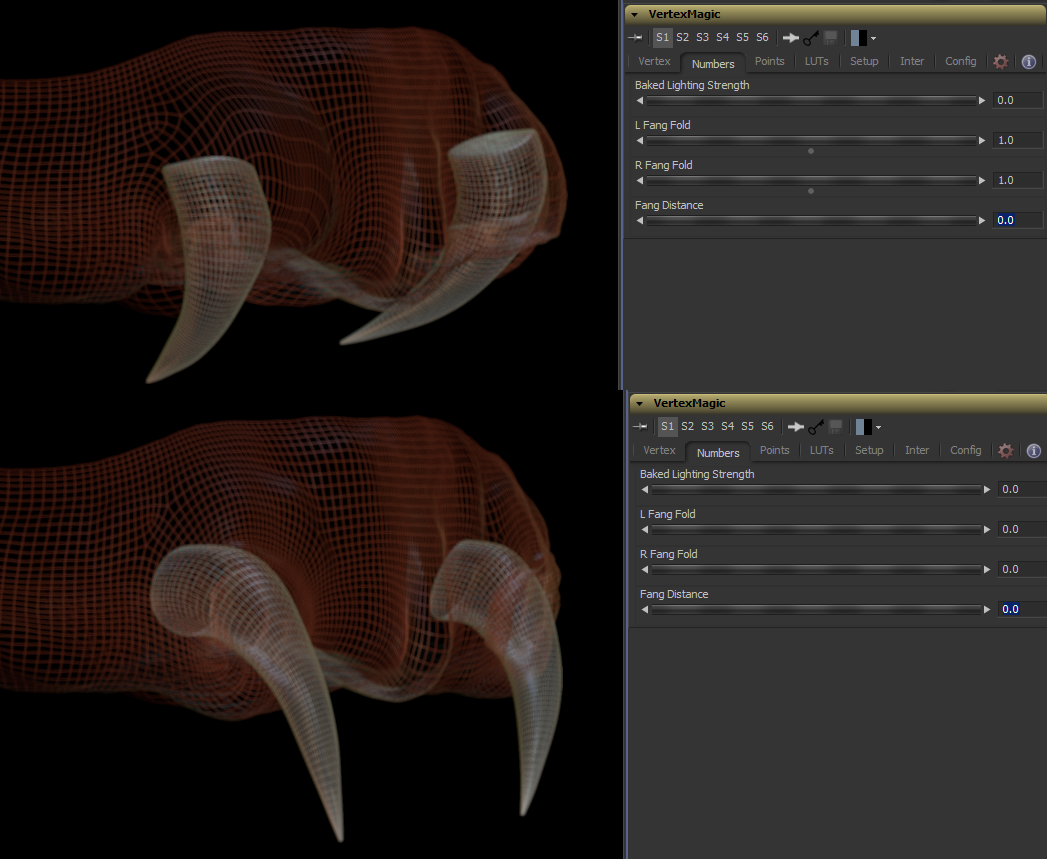
Here’s a look at the rendered teeth:
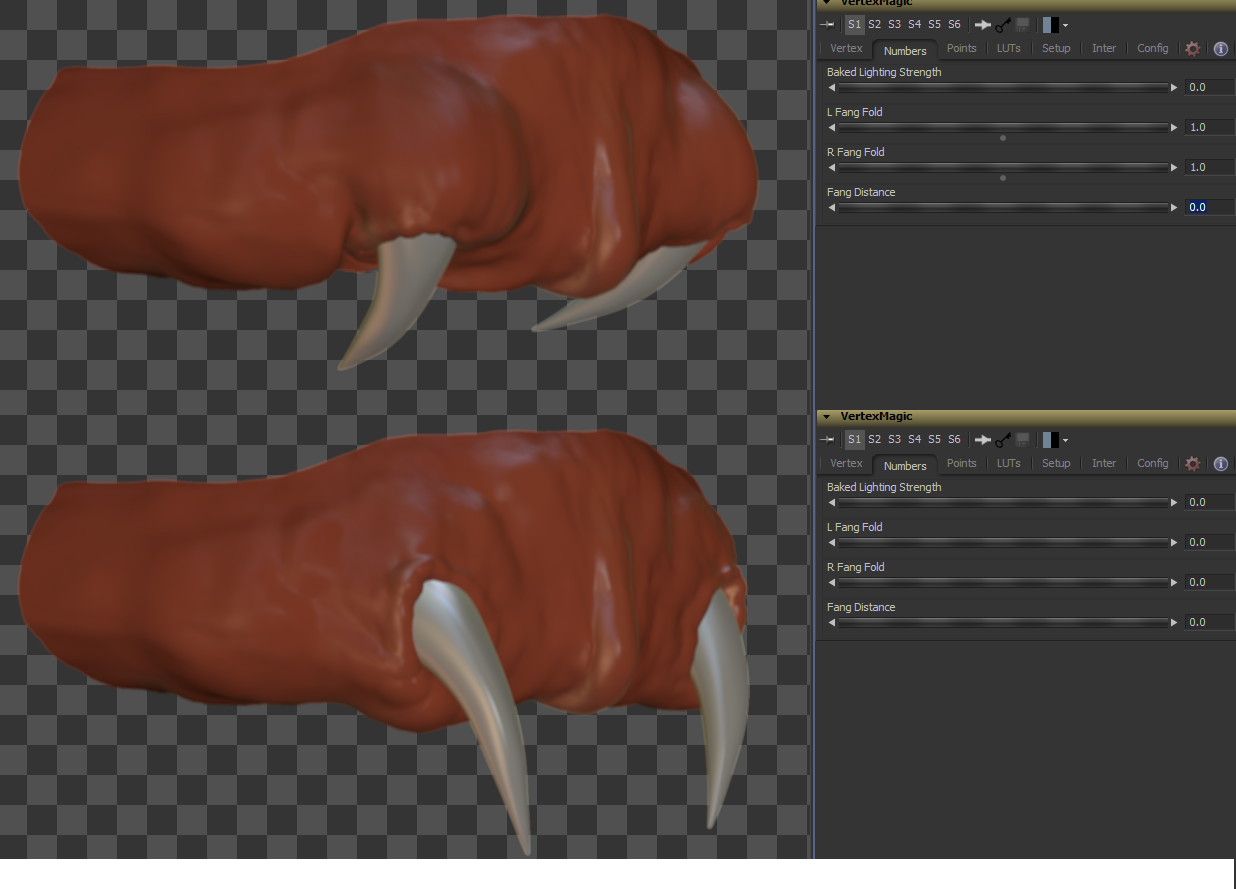
And wireframes, so you can see the deformation more clearly:
To see these teeth in action, tune in to From Dusk Till Dawn on the El Rey Network, currently showing on Tuesdays.

Images from From Dusk Till Dawn are the property of FactoryMade Ventures and the El Rey Network.
UPDATE: This technique was presented as a demo at the Blackmagic booth at SIGGRAPH 2017. By request, I have recorded a rehearsal of the demo and put it online:
Hello Bryan,
This is freaking awesome. I’m looking into fusion more and learning a lot about the math behind.
I understand the idea, but would like to bend a simple 3Dobject, like the bender tool in Fusion. But this one’s not working properly with krokodove shape create tool. (and there’s no bender3d from krokodove, just a 2d bender called “bend”
I’d love to watch the video you’re speaking about that was at the booth in the siggraph 2017. Where could I found it ?
Also, all your link of macros are dead unfortunatly also.
Great work and thank a lot for your knowledge !
Thanks for the compliments! Not sure what happened to the Vimeo link, but I’ve restored it. I’m aware that most of the links to my files are broken due to a change in hosts, but I haven’t had time to comb through all the posts and find them. If you note one is missing, please leave a comment on the article so I can find them more easily.
I misspoke about Bender3D. It was always a part of the main Fusion 3D toolset. I have no idea why I attributed it to Krokodove. I don’t currently have a version of Fusion installed right now that’s compatible with Krokodove, so I can’t investigate the interaction between its shape tools and Fusion3D. I seem to recall, though, that those tools only really play well with each other.
Oh, and most of the macros, fuses and scripts I made available here are also in Reactor, which is a better way of downloading and managing them, anyway.